Critical areas of an underexposed RAW

User avatar
robyferrero
ColorPerfect User
Posts: 151
Joined: Wed Aug 20, 2025 4:12 pm
Location: Italia

This file lends itself to multiple tests. After testing it for pre-noise reduction with CameraRAW, now it's time for underexposure.

In other words, a file full of flaws :-)

In cases like this, I notice that there are some shadow areas that are more critical, grainy, and show more noise and color shift.
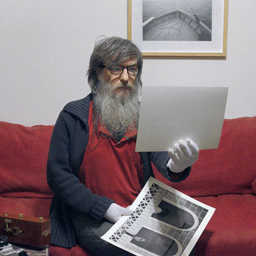
Like the area highlighted by the circle in the example below.
2023-005-0614-roby_ferrero-underexposer_file.jpg
2023-005-0614-roby_ferrero-underexposer_file.jpg (784.38 KiB) Viewed 878 times
[Full image link - opens in new tab]

I imagine this happens when Color Perfect sets its base curve.
From this point on, it's up to our workflow to adjust all the image values ​​to make it "perfect."

I find these critical shadow areas problematic.
Even when the image seems well-adjusted across all its values, these areas remain incorrect.

The only way I've found to make them a neutral gray shadow color is to use the Gamma tool.
2023-005-0614-roby_ferrero-underexposer_file-gamma_tool.jpg
2023-005-0614-roby_ferrero-underexposer_file-gamma_tool.jpg (982.11 KiB) Viewed 878 times
[Full image link - opens in new tab]

Obviously, this then involves modifying all the other tools previously adjusted.

But okay, that's beside the point. It's not important to have more or less black, or graduated white, after using Gamma.

My impression, however, is that using the Gamma tool to overcome this problem isn't the most correct approach.

Because, whether or not you use Gamma changes the image radically. Obviously, its density and brightness change, but the color also tends to gray, as in the critical shadow area, which, however, is corrected this way.
I understand that it's normal for darkening with Gamma to cause all these changes, but I don't know what else to do to solve the problem.

This, by the way, happens to me mostly with sea images. Much less, if at all, with other types of images.
C.Oldendorf
Developer
Posts: 167
Joined: Fri Sep 02, 2022 10:31 am
Contact:

robyferrero wrote: Wed Sep 17, 2025 12:33 pm I find these critical shadow areas problematic.
Even when the image seems well-adjusted across all its values, these areas remain incorrect.
Try this before we go any further. Right click on the area you perceive as darkest, set Zoom to 100%, scroll down BP Tails until you like what you are getting. For digital camera originating images the data is pre black point adjusted anyway, so if all fails toggle the BP Tails / B Point system off and see what happens.
User avatar
robyferrero
ColorPerfect User
Posts: 151
Joined: Wed Aug 20, 2025 4:12 pm
Location: Italia

With the BPTails reset it definitely improves.
2023-005-0614-roby_ferrero-underexposer_file-No_BPTails.jpg
2023-005-0614-roby_ferrero-underexposer_file-No_BPTails.jpg (351.34 KiB) Viewed 868 times
[Full image link - opens in new tab]

I also tried turning off BPTails and BP, but that doesn't work; it just gets worse.

Maybe because in this case there is no need to go that far.

Resetting BPTails was enough.

Thank you very much.
User avatar
AlexisMagni
ColorPerfect User
Posts: 44
Joined: Wed Aug 27, 2025 7:24 am

I was just working on a image that has clearly been underexposed, and I didnt find any issue with it after passing PerfectRAW so far. I guess I got lucky, or I didnt spot it yet :D
You can check my photos on Flickr:
https://www.flickr.com/photos/alec246_photography/
User avatar
robyferrero
ColorPerfect User
Posts: 151
Joined: Wed Aug 20, 2025 4:12 pm
Location: Italia

In fact, it's happened to me especially with sea photographs, and specifically, on water.

It doesn't happen in other photographs.
It might be less visible, or it might not happen at all, even if you leave the photograph nice and dense, as in your case.
I think this type of problem can arise from underexposed photographs that you try to lift a little too much.
I don't know, as I was saying, these are problems I encounter on water.
User avatar
AlexisMagni
ColorPerfect User
Posts: 44
Joined: Wed Aug 27, 2025 7:24 am

OH yeah I think I have a photography of the ocean side where there is an area on of highlight reflecting on the wave that turned into a distracting cast, but this was before I ever used PerfectRAW. I will have to try it to see how it handles that scenario.
You can check my photos on Flickr:
https://www.flickr.com/photos/alec246_photography/
User avatar
robyferrero
ColorPerfect User
Posts: 151
Joined: Wed Aug 20, 2025 4:12 pm
Location: Italia

Let's see, you won't necessarily find the same problem that I find in the gray areas.
C.Oldendorf
Developer
Posts: 167
Joined: Fri Sep 02, 2022 10:31 am
Contact:

AlexisMagni wrote: Wed Sep 17, 2025 6:39 pm I was just working on a image that has clearly been underexposed, and I didnt find any issue with it after passing PerfectRAW so far. I guess I got lucky, or I didnt spot it yet :D
Nice, are you sure it's under exposed? Those sunny patches might otherwise be blown and I think they make this shot what it is.
_DSC1495.jpg
_DSC1495.jpg (536.48 KiB) Viewed 859 times
[Full image link - opens in new tab]

I guess I like it cinematicly :-)
User avatar
AlexisMagni
ColorPerfect User
Posts: 44
Joined: Wed Aug 27, 2025 7:24 am

robyferrero wrote: Wed Sep 17, 2025 7:53 pm Let's see, you won't necessarily find the same problem that I find in the gray areas.
I checked the image I Mentioned, and the color patch that bothered me has nothign to do with noise, just how the sun hitting from behind the water created a distracting effect. Unfortunately I dont have anything underexposed that fits the requirements.
Nice, are you sure it's under exposed? Those sunny patches might otherwise be blown and I think they make this shot what it is.
This is the Linear Histogram I kept the exposure very dark with intention, because I wanted to capture that feeling I got, which it seems you captured as well, when I saw those trees in front of me in the late afternoon. Technically wise, probably would be better to have captured it as much to the right as possible, and then bring it down in post to retain detail, but this dense dark photo worked well for what I pictured. I am happy with it, if only there wasnt that light post in the middle :) I am against AI in my photos, but I might retouch it manually.
You can check my photos on Flickr:
https://www.flickr.com/photos/alec246_photography/
C.Oldendorf
Developer
Posts: 167
Joined: Fri Sep 02, 2022 10:31 am
Contact:

Exactly—that is the linear histogram. And if you look closely at that little trickle that crawls toward the right, those are the highlights that carry the detail in the brighter parts of your scene. At the same time, however, it is notoriously difficult to judge linear histograms for the very reason we have discussed so many times: in linear encoding, the very brightest exposure value already occupies half of the histogram’s width, the second brightest half of what remains, and so on. The distribution is heavily weighted toward the highlights, which makes intuitive assessment nearly impossible if you are used to judging tonal balance in perceptually scaled terms.

So if you really do want to look at histograms as a means of analysis, the most straightforward way of doing so is to duplicate the image in Photoshop and open that duplicate in ColorPerfect’s TouchUp mode. There, select a linear input. In practice, that means pressing the GL button until it displays L. Alternatively, if you have configured ColorPerfect’s options to use dual gamma-c, you will see two pull-down menus: one will be auto-populated with the color profile corresponding to your image, while the other will let you choose from the available input encodings, including linear. Selecting that option does nothing to the image in terms of correction; it merely applies the appropriate gamma or tone reproduction curve encoding so that the histogram is presented in a form more consistent with what you are accustomed to for judging brightness relationships.

The important point is that you are still looking at the unscaled, unadulterated raw data of the capture. What changes is not the underlying information but only the way it is represented for human interpretation. That small adjustment allows histograms to serve their purpose as a quick diagnostic tool without luring you into the false impression that a linear histogram tells you anything useful at first glance.
User avatar
AlexisMagni
ColorPerfect User
Posts: 44
Joined: Wed Aug 27, 2025 7:24 am

Learned a new trick :)

Here is the Gamma Corrected Histogram of the Raw
You can check my photos on Flickr:
https://www.flickr.com/photos/alec246_photography/
User avatar
robyferrero
ColorPerfect User
Posts: 151
Joined: Wed Aug 20, 2025 4:12 pm
Location: Italia

I don't think AI is needed for that streetlight. Select the entire crack and, using the clone tool, click on the upper trunk and drag it down. That's it, right?

AI to remove objects or correct situations like yours, but more complex, is welcome.
Personally, I'm not interested in the photo processing.
User avatar
robyferrero
ColorPerfect User
Posts: 151
Joined: Wed Aug 20, 2025 4:12 pm
Location: Italia

The first thing to say is that I made a mistake when I said that, in the previous example, turning off BP and BPTails made things worse in the shadow area in question. That's not true!

I was misled by the fact that, when CP is activated, BP automatically reactivates itself.
I didn't notice this because it's the first operation to perform, and the image is still flat and washed out. Then, when I proceeded with Graduated White, I no longer noticed the BP checkmark.

No big deal; turning off BP and BPTails actually works, and actually works well. It completely eliminates the defect, but it remains soft and low-contrast.

In any case, is it normal for BP, once turned off, to automatically reactivate when CP is activated?

Let's move on to the new examples, in this case performed on the DxO pre-noise reduction, which looks extraordinary. You can see in the example below that resetting BPTails did not lead to a good result, which looks worse than the example performed on the previously published CameraRAW pre-noise reduction file.
2023-005-0614-roby_ferrero-DxO_DeepPRIME XD3 X-Trans-cp-BPTails_minimum.jpg
2023-005-0614-roby_ferrero-DxO_DeepPRIME XD3 X-Trans-cp-BPTails_minimum.jpg (351.49 KiB) Viewed 830 times
[Full image link - opens in new tab]

However, things are different in the example below, which was also run on the file with DxO pre-noise reduction.
Turning off BP and BPTails led to a result that was unexpected for me. In some ways, it was extraordinary; in others, it left me perplexed.

The defects in the shadow areas literally disappeared; they were no longer there; it became a completely neutral and wonderful gray.

The overall color, different from the previous examples, still seems good to me, even beautiful to look at, but the contrast seems low.
2023-005-0614-roby_ferrero-DxO_DeepPRIME XD3 X-Trans-cp-BPTails_off-BP_off.jpg
2023-005-0614-roby_ferrero-DxO_DeepPRIME XD3 X-Trans-cp-BPTails_off-BP_off.jpg (364.2 KiB) Viewed 830 times
[Full image link - opens in new tab]

C.Oldendorf
Developer
Posts: 167
Joined: Fri Sep 02, 2022 10:31 am
Contact:

robyferrero wrote: Thu Sep 18, 2025 12:33 pm In any case, is it normal for BP, once turned off, to automatically reactivate when CP is activated?
Yes. If it chooses values that are too high for your liking, you can set the Shadows threshold on PerfectRAW’s options screen (these are per mode) to a very small value. Most often, color-wise, having BP Tails and the corresponding BP Colors is better than not. Only for certain images without depth should the system be toggled off.

But the same applies as I’ve said elsewhere: when the plug-in starts, it shows a plausible starting point, not some magical automatic “best.”
User avatar
robyferrero
ColorPerfect User
Posts: 151
Joined: Wed Aug 20, 2025 4:12 pm
Location: Italia

Sure, it shows a plausible starting point, not necessarily the best one.

The shadow threshold is very low. Does that mean I need to raise the threshold if I want fewer shadows?

In any case, if I drastically lower the shadow threshold, are the CodeBP and ColorBP less consistent?
I can't look at it in PerfectRAW right now because I'm processing an Imacon scan in B&W.
C.Oldendorf
Developer
Posts: 167
Joined: Fri Sep 02, 2022 10:31 am
Contact:

robyferrero wrote: Thu Sep 18, 2025 1:51 pm The shadow threshold is very low. Does that mean I need to raise the threshold if I want fewer shadows?
In any case, if I drastically lower the shadow threshold, are the CodeBP and ColorBP less consistent?
The default is 0.000050 in CP3 for PerfectRAW, since digital camera data is typically pre-corrected for BP. I expect you’ll be fine with 0.000005 if you prefer it that way.
User avatar
robyferrero
ColorPerfect User
Posts: 151
Joined: Wed Aug 20, 2025 4:12 pm
Location: Italia

I'll try 0.000005, if I don't like it I'll go back.
C.Oldendorf
Developer
Posts: 167
Joined: Fri Sep 02, 2022 10:31 am
Contact:

robyferrero wrote: Thu Sep 18, 2025 2:06 pm I'll try 0.000005, if I don't like it I'll go back.
It stays a starting point, so you'll keep scrolling BP Tails initially to see what works per image :-)
User avatar
robyferrero
ColorPerfect User
Posts: 151
Joined: Wed Aug 20, 2025 4:12 pm
Location: Italia

Of course, it's not off, it's at its lowest setting.
One mistake I made early on, and I did until recently, was to adjust BPTails at the end of the process to restore some shadows. It's better to do it at the beginning.
C.Oldendorf
Developer
Posts: 167
Joined: Fri Sep 02, 2022 10:31 am
Contact:

robyferrero wrote: Thu Sep 18, 2025 2:15 pm Of course, it's not off, it's at its lowest setting.
One mistake I made early on, and I did until recently, was to adjust BPTails at the end of the process to restore some shadows. It's better to do it at the beginning.
Yes that is true, BP Tails should be set first or early after setting Black bright enough to decently see something, that can be fine tuned later.
C.Oldendorf
Developer
Posts: 167
Joined: Fri Sep 02, 2022 10:31 am
Contact:

AlexisMagni wrote: Thu Sep 18, 2025 10:12 am Learned a new trick :)
Here is the Gamma Corrected Histogram of the Raw
Yes and as you can see the shot is suitably exposed for the subject and not underexposed :-)
We can get that noise fixed, we can't get those cut off details back. The fun thing though is that in camera images start becoming weird 8-)
User avatar
robyferrero
ColorPerfect User
Posts: 151
Joined: Wed Aug 20, 2025 4:12 pm
Location: Italia

In fact, it's unlikely to underexpose a homogeneous scene, probably below zone V. There's no contrast; the light meter will immediately put it in zone V even if it were in zone IV.
Those highlights practically don't even affect the light meter, and if they did, it's on the order of 1/3 of a stop, but not even that; in fact, they're overexposed. It's more likely that the slightly brighter area on the upper right will steal that 1/3 stop, but even that has almost no effect. In the worst-case scenario, you still have some leeway, because that scene is already overexposed by the light meter.
Then, if you look, if the undergrowth were in zone 4, you'd have to underexpose by 1 f/stop to get the same atmosphere.
And maybe it was taken with a Nikon, with matrix metering? Which, along with the Fujifilm, are, in my opinion, among the best light meters on any camera.
User avatar
AlexisMagni
ColorPerfect User
Posts: 44
Joined: Wed Aug 27, 2025 7:24 am

C.Oldendorf wrote: Thu Sep 18, 2025 4:23 pm
AlexisMagni wrote: Thu Sep 18, 2025 10:12 am Learned a new trick :)
Here is the Gamma Corrected Histogram of the Raw
Yes and as you can see the shot is suitably exposed for the subject and not underexposed :-)
We can get that noise fixed, we can't get those cut off details back. The fun thing though is that in camera images start becoming weird 8-)
You both have a much more acute eye for noise than I do :) It really never caught my attention, even if I look for it. But Digital Noise can quickly become unpleasant, unlike analog grain which looks nice.
In fact, it's unlikely to underexpose a homogeneous scene, probably below zone V. There's no contrast; the light meter will immediately put it in zone V even if it were in zone IV.
Those highlights practically don't even affect the light meter, and if they did, it's on the order of 1/3 of a stop, but not even that; in fact, they're overexposed. It's more likely that the slightly brighter area on the upper right will steal that 1/3 stop, but even that has almost no effect. In the worst-case scenario, you still have some leeway, because that scene is already overexposed by the light meter.
Then, if you look, if the undergrowth were in zone 4, you'd have to underexpose by 1 f/stop to get the same atmosphere.
And maybe it was taken with a Nikon, with matrix metering? Which, along with the Fujifilm, are, in my opinion, among the best light meters on any camera.
I am having trouble remembering, I shot this with the Zf with the M Mount Zeiss adapted I told you about, and it was a Manual Exposure. But not sure if that exposure came from the camera, from the cellphone app, probably I added some exposure compensation to get the mood I wanted. Very true my meter probably had no influence from those bright highlights.
You can check my photos on Flickr:
https://www.flickr.com/photos/alec246_photography/
User avatar
robyferrero
ColorPerfect User
Posts: 151
Joined: Wed Aug 20, 2025 4:12 pm
Location: Italia

I don't see much noise in that photo.
In my opinion, if there's any, you can leave it. Especially if you don't reduce it with DxO.
Try doing a soft proof on PS matte paper, enlarging a dark or underexposed area. You'll see that there's not much to remove, even if it's a little noticeable.
So, out of curiosity, is the Zf a Bayer with or without a low-pass filter?
C.Oldendorf
Developer
Posts: 167
Joined: Fri Sep 02, 2022 10:31 am
Contact:

C.Oldendorf wrote: Thu Sep 18, 2025 4:23 pm We can get that noise fixed, we can't get those cut off details back.
I was generally speaking, not about Alexis' image at hand.
Post Reply

Return to “On PerfectRAW - Change Your Photographic Art and Vision of the World”